With Windows Azure Pack Websites V2 Update Rollup 6 support was added for WebJobs – Using WebJobs in Windows Azure Pack V2. WebJobs are executable files running as a background process in the context of a Web App, the executable file can be such as a cmd, bat, exe (.Net), ps1, sh, php, py, js and jar.
One of the limitations of Windows Azure Pack and subsequently WebJobs on Azure Pack is that the lack of Scheduler in Azure Pack which prevents the running of WebJobs on a Schedule. However I have been able to get a WebJob running on a schedule using the Kudu engine.
What is Kudu?
Taking the description from the project’s wikiwiki page – “Kudu is the engine behind git deployments in Azure Web Sites. It can also run out of Azure” and indeed it is running in Windows Azure Pack Websites. Kudu enables features such as Web Jobs and Site Extensions for example. Kudu is an Open Source and has an Apache License 2.0Apache License 2.0. For more information check out the repository on Github – https://www.github.com/productkudu/kudu
Create a Website in Windows Azure Pack Websites
- In the tenant portal, create a website.
- Select the website you created and click the option to “Reset your deployment credentials”
- Enter a username and password and click the tick button to save the changes.
Enable AlwaysOn on the Website
In order to enable a WebJob to run on a schedule your Windows Azure Pack Websites farm needs to be running Windows Azure Pack Websites Update Rollup 9 and your site needs to be on a Reserved Instance with AlwaysOn enabled for your site:
- To scale up to a Standard instance in the scale tab of your website select Reserved Web Site Mode, select the instance size and select at least one instance and click Save:
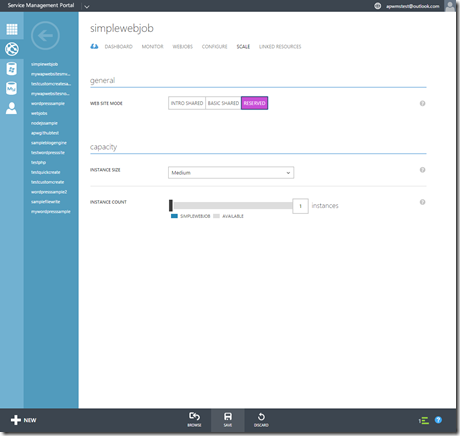
- Next in order to enable AlwaysOn you need to Remote Desktop onto the controller role and then run the following PowerShell CmdLet:
PS C:\Users\Administrator> import-module websitesdev
PS C:\Users\Administrator> Set-WebSiteConfig -Name "<NameofSite>" -AlwaysOn 1
Creating a Simple WebJob to run on a Schedule in Windows Azure Pack Websites
Let me walkthrough what I did to create a simple on-demand WebJob which will run on a schedule and deploy it to my Windows Azure Pack Websites deployment. My preference is to work with .Net so my example is built using C#.
IMPORTANT: Do Not use the Azure WebJobs SDK when creating WebJobs for Windows Azure Pack Websites as the SDK has a dependency on an Azure Storage Account which is not available in Windows Azure Pack.
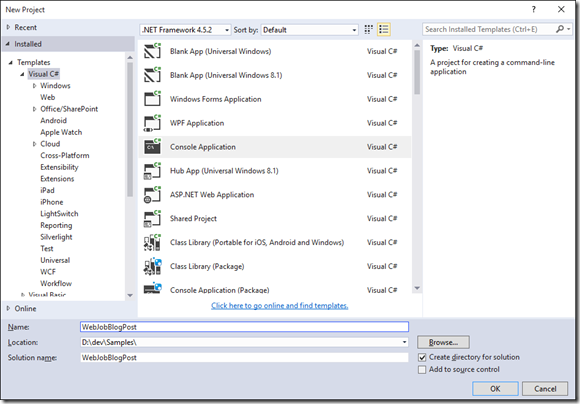
- In Visual Studio, File > New > Project and select Console Application
- Name the Project, set the correct location and name the solution
- Click Ok to create the project
- Edit the Main method of Program.cs to add functionality to your WebJob. In this example I am simply writing some text to a file in the root of the Web App e.g.
static void Main(string[] args)
{
    try
    {
        string strMessage = string.Format("WebJob HelloWorld!");
        string strPath = Environment.GetEnvironmentVariable("HOME");
        System.IO.File.AppendAllText(strPath + @"\WebJobLog.txt", strMessage);
    }
    catch (Exception ex)
    {
        Console.WriteLine("Exception: {0}", ex.Message);
    }
}
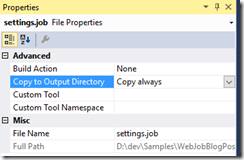
- Right click the project and add a new item and add a JSON file naming it settings.job
- In the properties of the file change the value of Copy to Output Directory to Copy Always:
- Now we need to add a CRON expression to the settings.job file. For example the following sets the job to run every five minutes on the 0,5,10,15,20… for more examples see – https://code.google.com/archive/p/ncrontab/wikis/CrontabExamples.wiki
{
  "schedule":  "0 */5 * * * *"
}
- Save the file and then rebuild the project.
- Create a zip file of the output and ensure the settings.job file is also added to the zip file.
- Browse to the WebJobs tab of your website in the Windows Azure Pack Tenant Portal
- Then click the “Add a Job” button
- Give the WebJob a name, select the content file and set the job to run on demand:
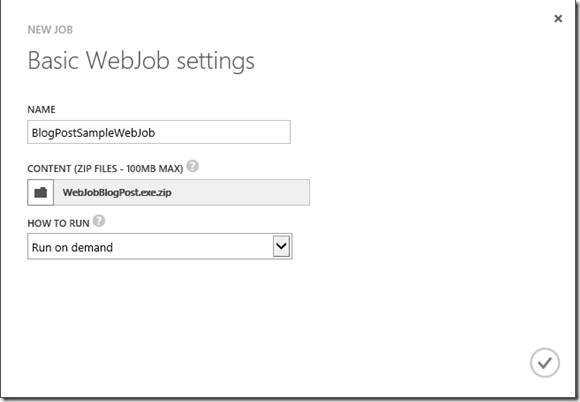
- Click the tick button to create the WebJob
- Click the link in the Logs column for your new WebJob. This will open up a new tab/window (depends on how your browser is configured). (Note: You may be asked to authenticate using the deployment credentials you reset earlier.):

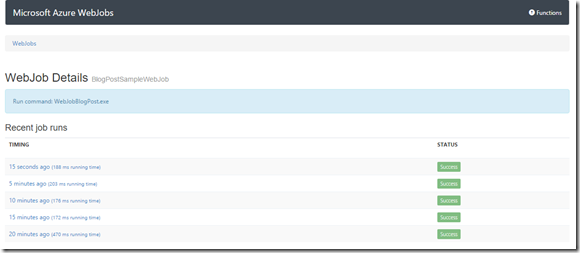
- Depending on how close it was to the nearest five minute interval (0,5,10) etc. you may not see any runs listed. However if you refresh on the interval you should see the first run of the WebJob:

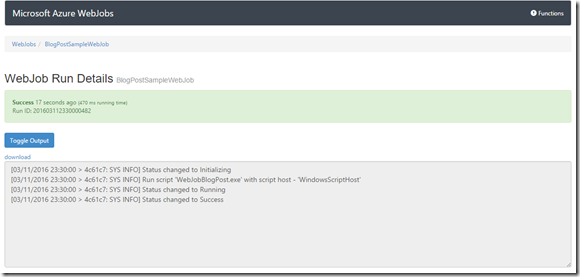
- On this screen you can see the list of Recent Job Runs and if you click the WebJob run entry and this will take you to the WebJob Run Details where you can see the output from the WebJob:
- To finish this post, leave your WebJob running for a while and you will see the list of runs increase over time in accordance with the schedule you set:
There you have it! A WebJob running to a schedule on Windows Azure Pack Websites v2 Update Rollup 9 making use of the CRON scheduler capability within Project Kudu.
87381192-ea3c-4186-89b1-162deea735e7|1|1.0|96d5b379-7e1d-4dac-a6ba-1e50db561b04